Preparing Distribution Lists/Contacts from Outlook for Upload into Workflow Management
Preparing Distribution Lists/Contacts from Outlook for Upload into Workflow Management
Exporting Distribution Lists
Outlook supports the export of individual distribution lists. However, if you wish to upload multiple distribution lists to Workflow Management, you will need to export each distribution list separately. Then, you can either upload them individually or combine the lists into a single spreadsheet for upload.
Note that Outlook will only allow you to export those distribution lists for which you are the owner or administrator. If you need to upload other distribution lists into AuthorSpace, you will need to ask the respective owners/administrators to do the initial export from Outlook for you.
Export Distribution List File from Outlook 2003/2007/2010
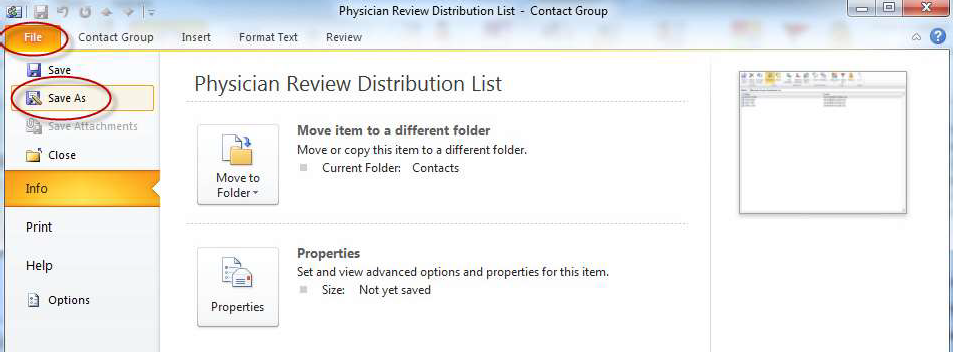
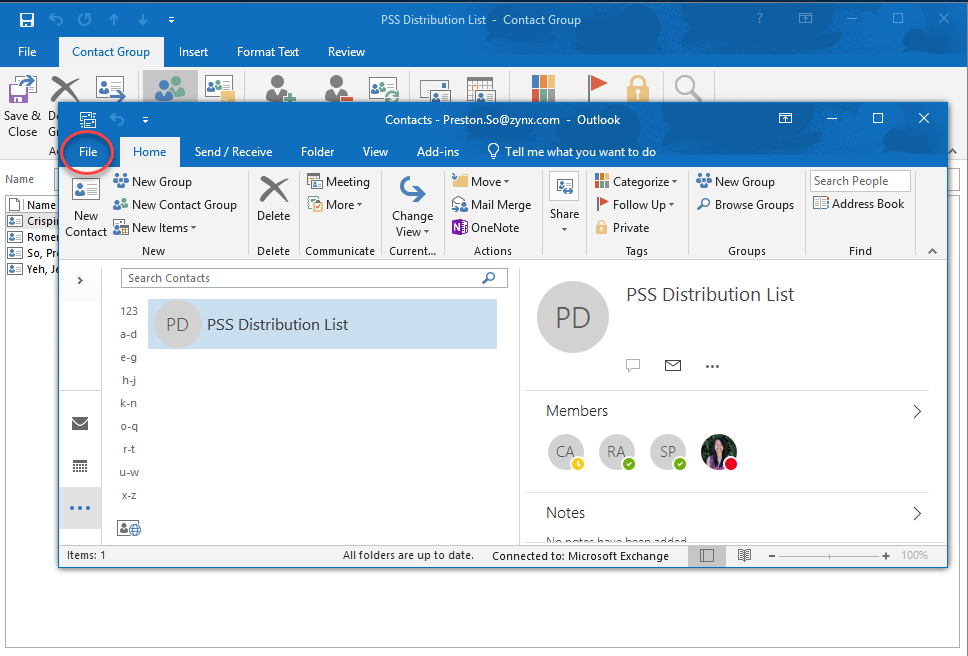
- From the Home tab, select Contacts and double-click the desired Distribution List to open it.
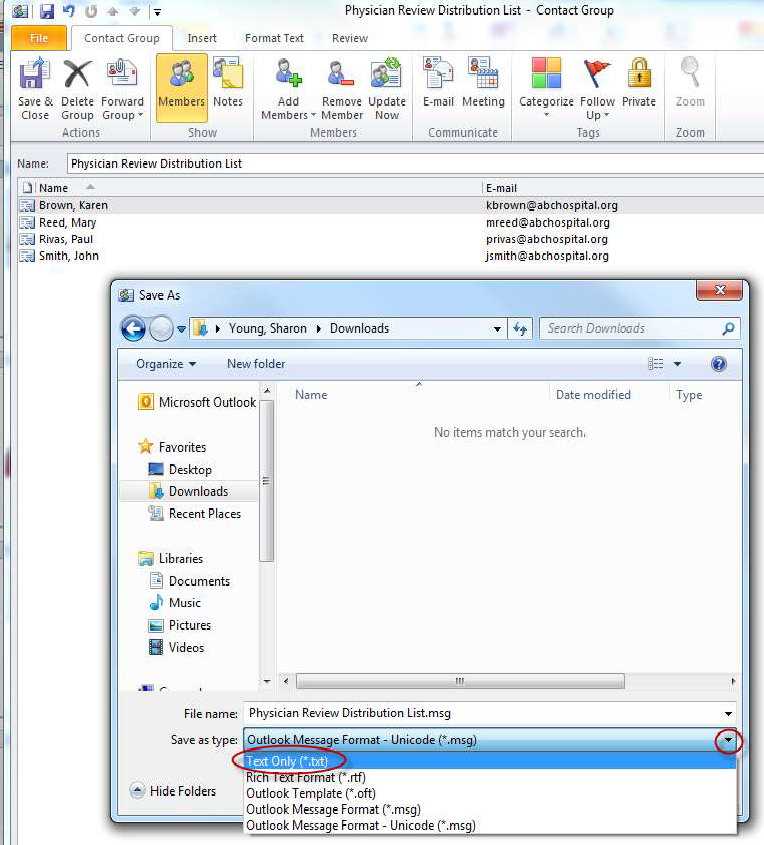
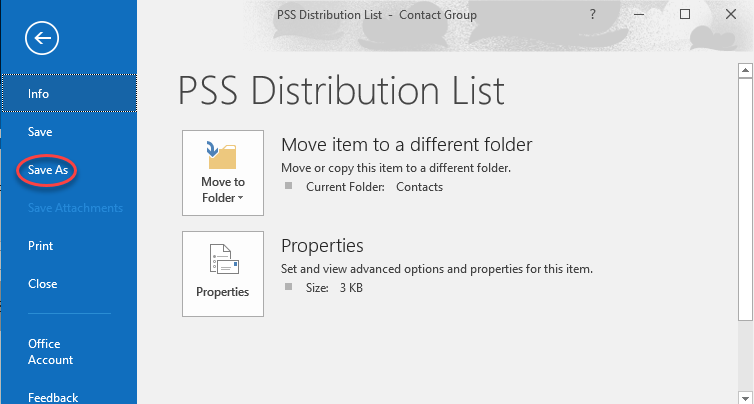
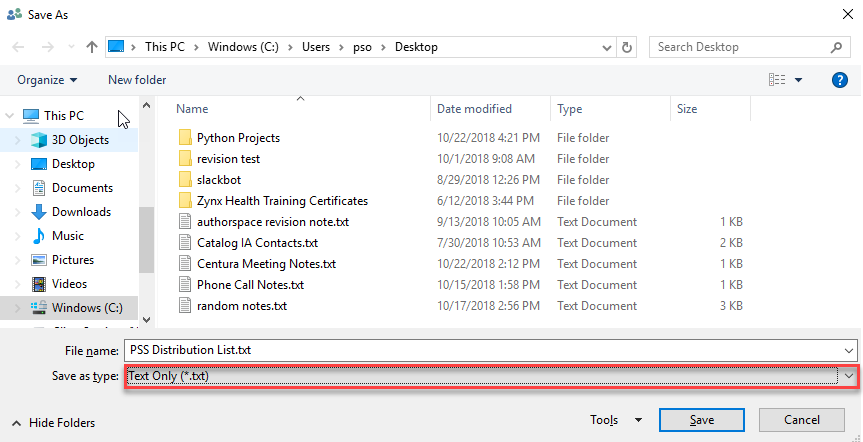
- From the File tab, select Save As and then select Text Only (*.txt) from the Save as type drop- down.
Export Distribution List File from Outlook 365
- From the Home tab, select Contacts and double-click the desired Distribution List to open it.
- From the File tab, select Save As and then select Text Only (*.txt) from the Save as type drop- down.
Prepare File for Upload into Workflow Management
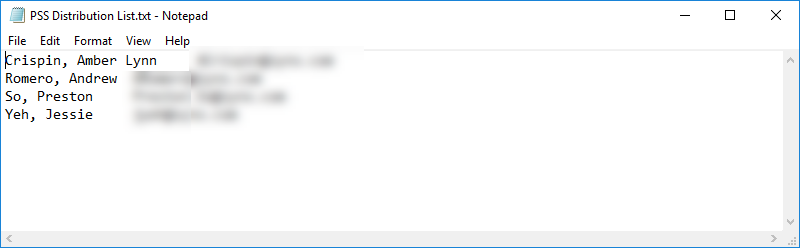
- Open the .txt file you have just created. It should appear as something like this.
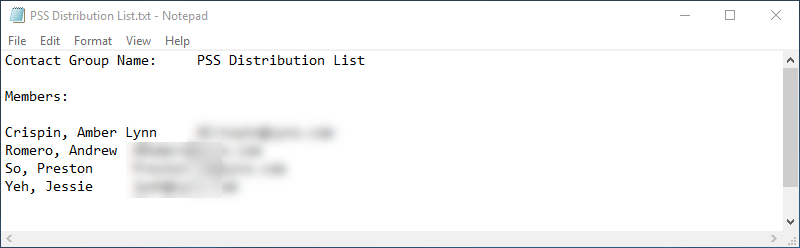
- Erase the first two lines of text and adjust the spacing so that the contact information appears at the top.
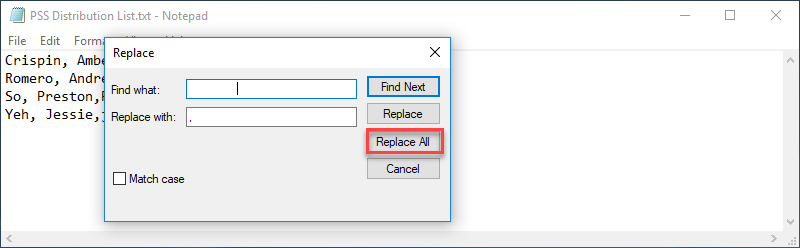
- Highlight the space between one name and an email. Press CTRL+C to copy the space. Press Edit then Replace. Paste, CTRL+V, the space into the Find what: parameter and put a “,” into the Replace with: Parameter. Select Replace All.

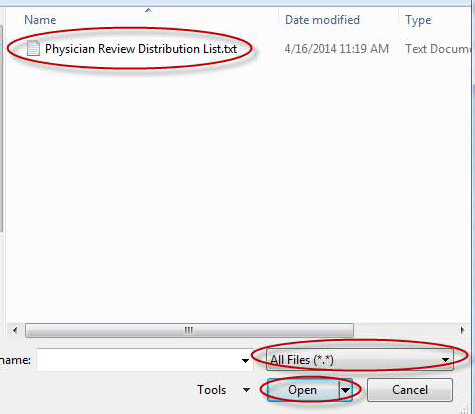
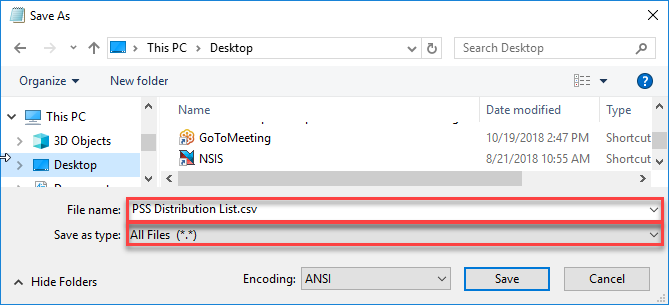
- Save the file as a .csv file and select All Files (*.*) as the file type.
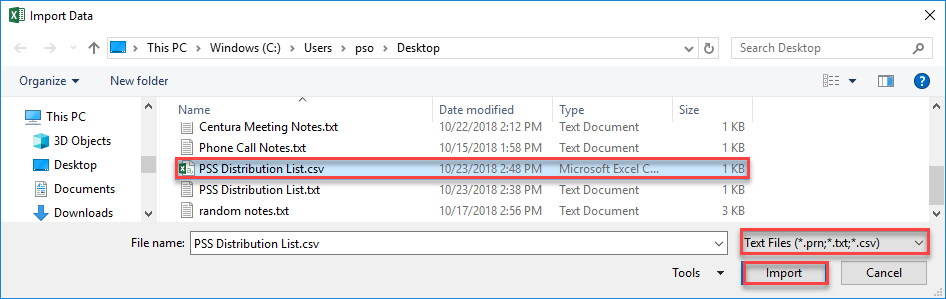
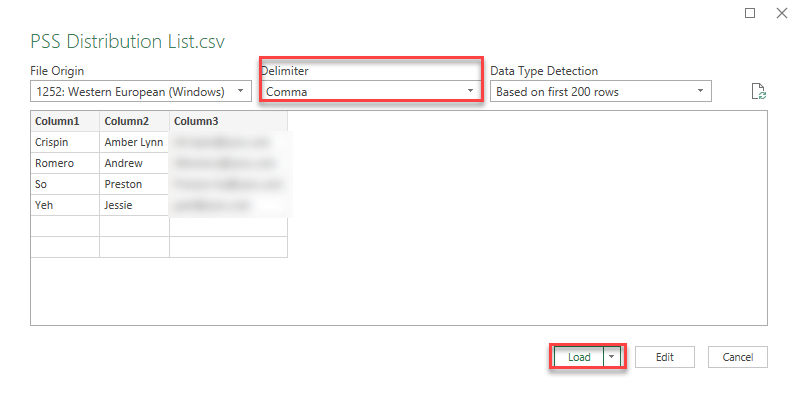
- Launch Excel and open a blank workbook. From the File tab, select the Data tab and click From Text/CSV. For your file to appear, you will need to ensure that the drop-down to the right of File name shows either All Files (*.*) or Text Files (*.prn;*.txt*;*.csv). Select the .csv file you just created and Import.
- A preview should be shown. Make sure that the Delimiter is set to Comma. When the preview is appropriate, click Load.
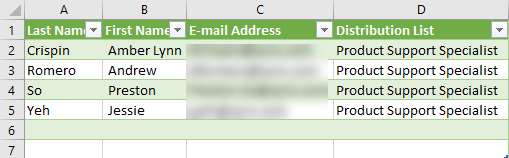
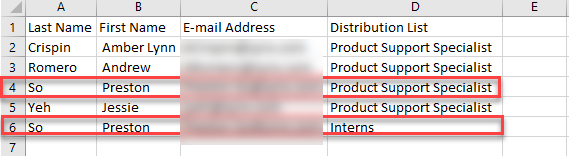
- You will need to format the spreadsheet that subsequently appears to align exactly with the following heading conventions:
- Column A: Last Name
- Column B: First Name
- Column C: E-mail Address
- Column D: Distribution List
Column D should be populated with the full distribution list name. Note that the name is split across multiple columns in the example below.
Other requirements to be aware of:
- Empty rows are not allowed.
- Extra spaces within a cell are not allowed.
To format the above spreadsheet, you would need to:
- Delete row 1
- Insert a row at the top of the spreadsheet
- Type the following into the appropriate cells
- Cell A1: Last Name
- Cell B1: First Name
- Cell C1: E-mail Address
- Cell D1: Distribution List
- Type the full name of the distribution list into column D beneath the header and copy and paste it into the rest of the populated rows. The final correctly formatted spreadsheet should look like this:
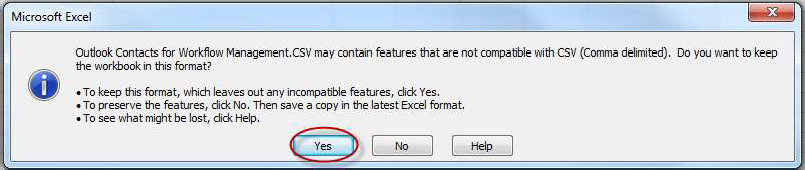
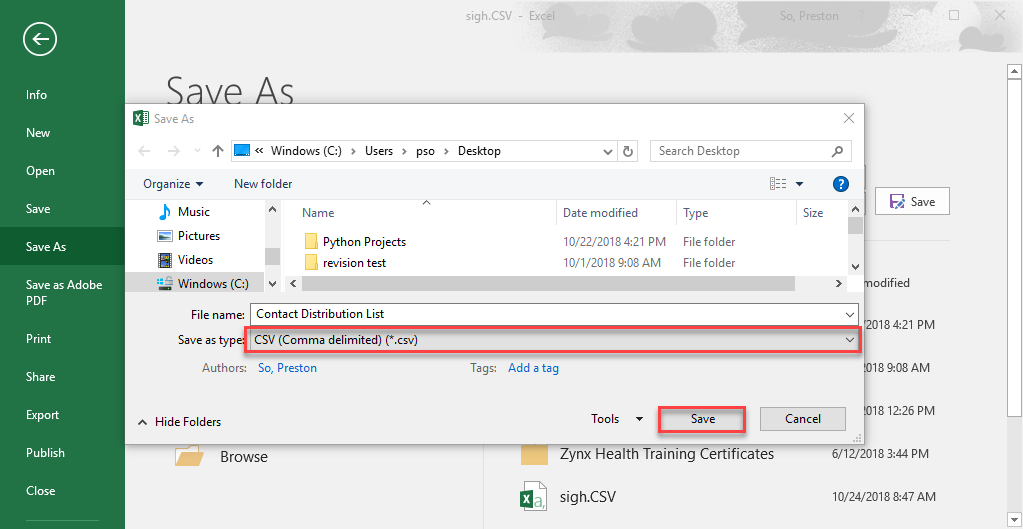
- Save the correctly formatted spreadsheet as a .csv file. Make sure that you select the file type CSV (Comma delimited) (*.csv)
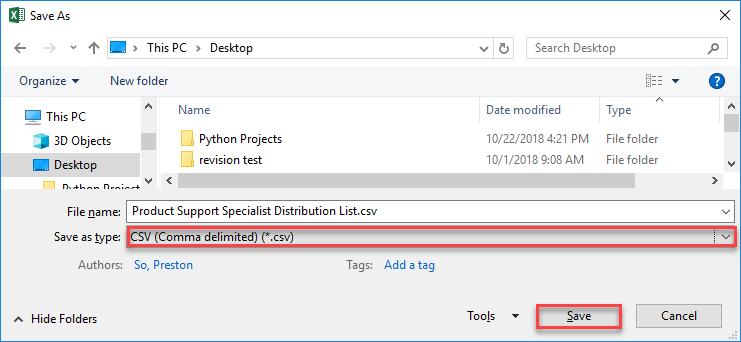
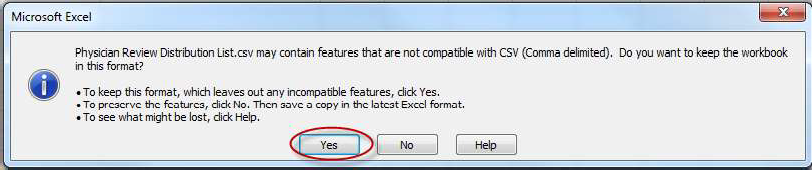
- If you get any warning messages, click OK or Yes.

That’s it! Your distribution list is now ready to be imported into Workflow Management. If you choose to combine multiple distribution lists into a single .csv file for upload and a single contact belongs to more than one distribution list, that contact should be listed in multiple rows with different distribution list in each row under column heading Cell D1:
If you upload any distribution lists that do not already exist in Workflow Management, AuthorSpace will automatically create the distribution list and tie the respective reviewer records to the indicated distribution list.
Exporting Contacts
With this enhancement, you also can choose to export all your Outlook contacts and upload them into Workflow Management as reviewers (users with AuthorSpace accounts still need to be created in the usual manner). As with the distribution lists, you need to be the owner or administrator to perform the export. These instructions are for Outlook 365.
Export Contacts File from Outlook 2004/2007/2010
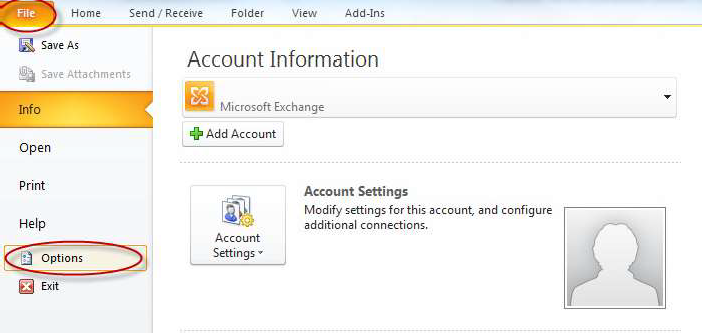
- For Outlook 2010, from the File tab, select Options.
For Outlook 2003/2007, from the File tab, select Import and Export.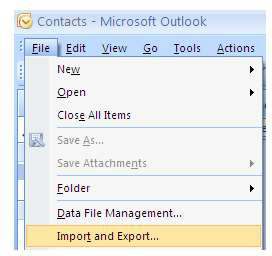
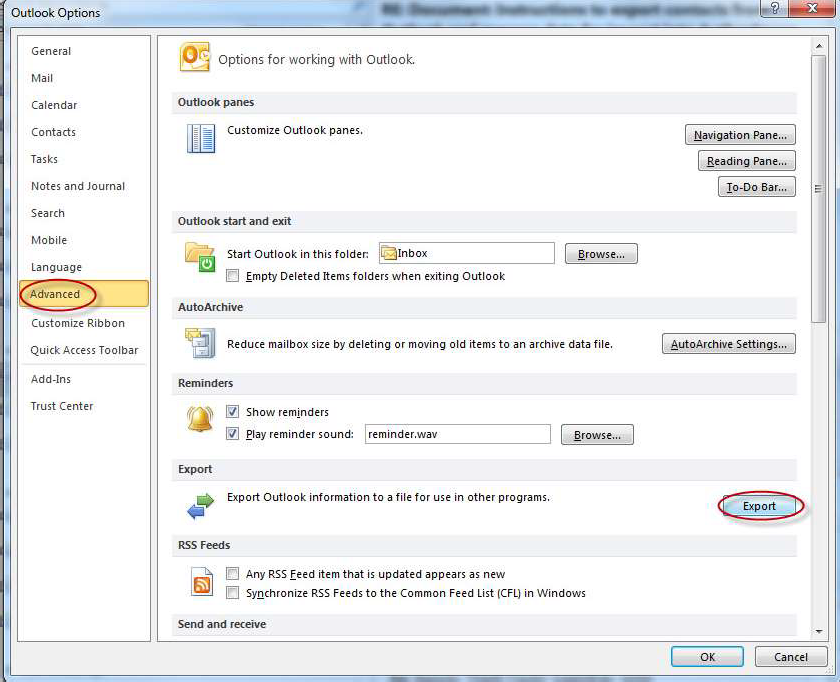
- For Outlook 2010, from the Outlook Options window, select Advanced and click Export.
For Outlook 2003/2007, this step is unnecessary
Note: The rest of the steps are identical
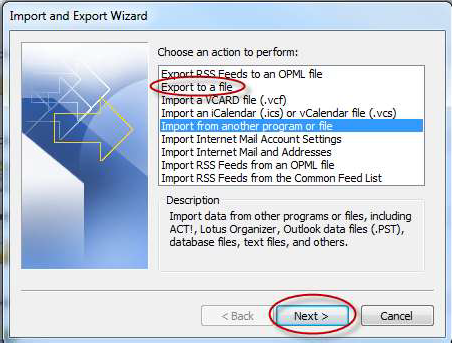
- From the Import and Export Wizard, select Export to a file and click Next.
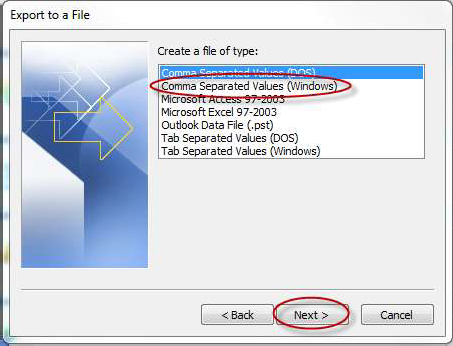
- Select Comma Separated Values (Windows) and click Next.
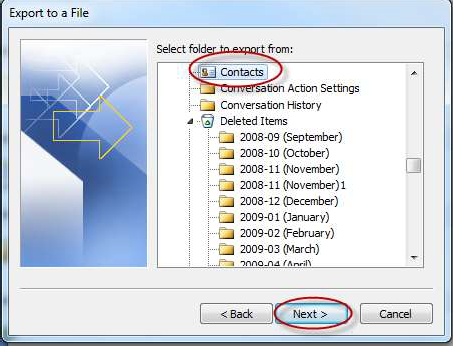
- Select the Contacts folder and click Next. Remember that you can only export Contacts for which you are the owner or administrator.
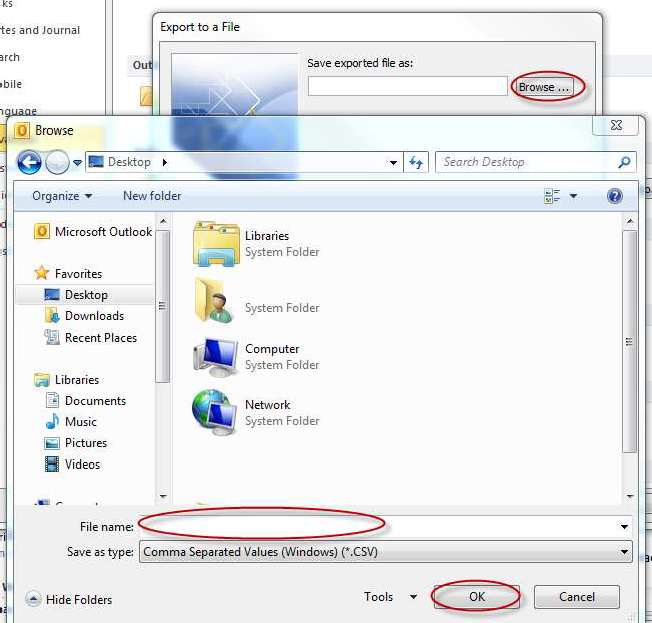
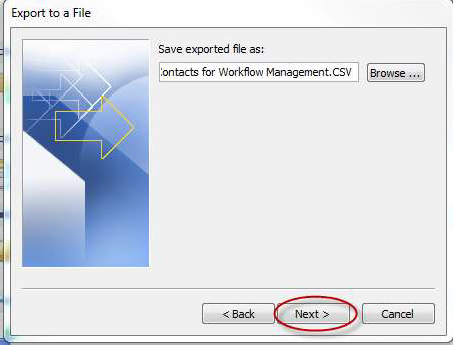
- Click Browse to choose a destination folder. Enter the File name and click OK. Then click Next.
- Leave the default selection checked and click Finish.
Export Contacts File from Outlook 365
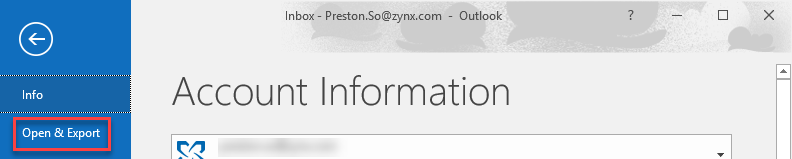
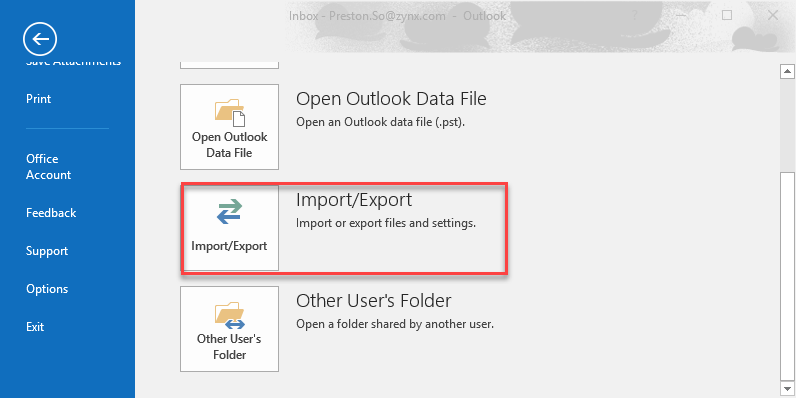
- Click on File and then on Open and Export. Select Import/Export.

- In the new window, select Export to a file and click Next.
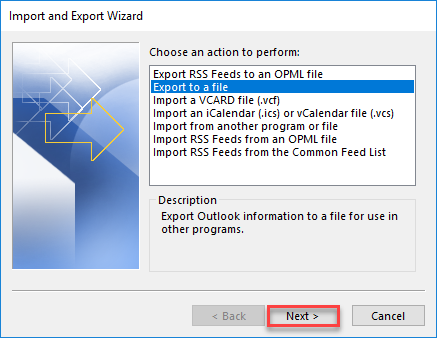
- Select Comma Separated Values and click Next.

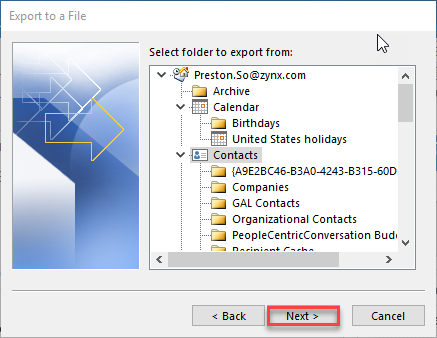
- Select Contacts and click Next.
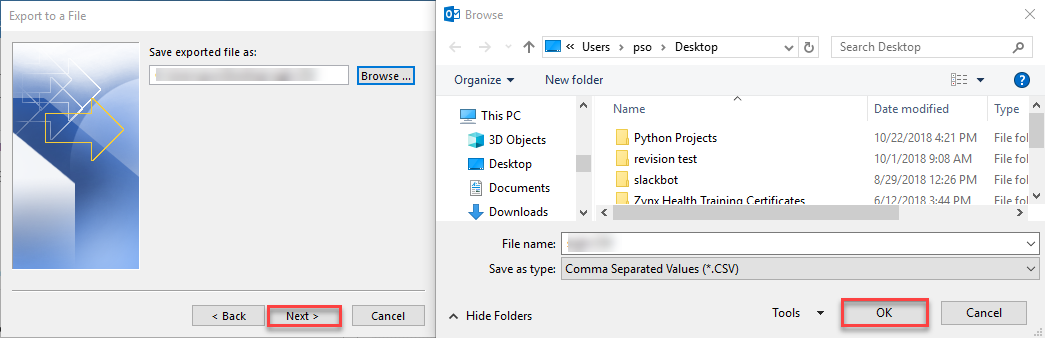
- Click Browse to set the file destination and name. Make sure that the file is saved as a .csv file. Click OK when you are done and then click Next.
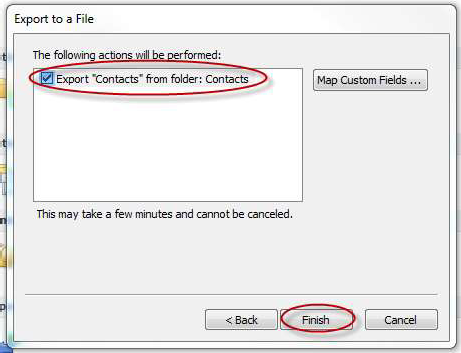
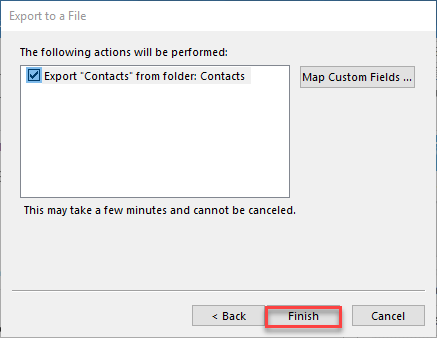
- Keep the box checked under The following actions will be performed. Click Finish.
Prepare File for Upload into Workflow Management
- Launch the .csv file that was created. It should open up in Excel.
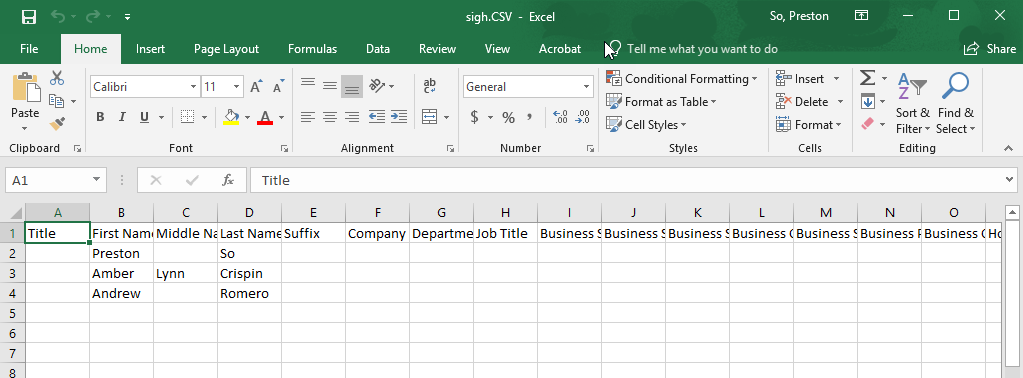
- Remove all unnecessary columns from the file. The required columns are First Name, Last Name, and Email Address. In the example shown below, only columns B, D, and BF are necessary. Note that other Outlook versions may extract the data into different columns.

- Format the spreadsheet so that it aligns exactly with the following heading conventions:
- Column A: Last Name
- Column B: First Name
- Column C: Email Address
- Column D: Distribution List
Other than the heading, column D may be blank; all other columns must be populated. If you have distribution list information, you can either enter it here or export it and upload it separately to Workflow Management.
The final correctly formatted spreadsheet should look like this: 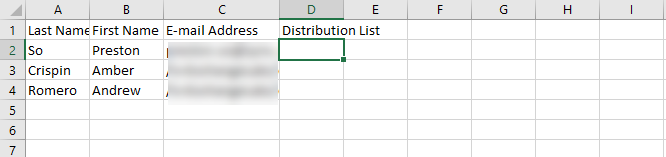
- Save the correctly formatted spreadsheet as a .csv file. Make sure to have the file type as CSV (Comma delimited) (*.csv).
- If you get any warning messages, click Yes.